How to Insulate Electrical Outlets & Lower CA Insurance
You feel it first in the chair by the window, or when you walk past a living room outlet on a cold evening. The room is heated, the windows look shut tight, but a thin draft keeps showing up. A lot of homeowners chase the wrong fix. They blame the window, the door sweep, or the HVAC, when the leak is moving through the wall around an outlet box.
That small draft matters more than commonly believed. If you're trying to insulate electrical outlets, you're not just doing a comfort project. You're tightening part of the building envelope, reducing a known path for air leakage, and addressing one of the little maintenance details that fits into a bigger home protection strategy in California.
For homeowners thinking beyond utility bills, this kind of work also belongs in the same conversation as home insurance, wildfire preparedness, and overall property upkeep. Small defects rarely stay small for long.
Why Outlet Insulation Matters More Than You Think
A drafty outlet is usually a sign of a bigger air-sealing problem inside the wall, not a minor comfort quirk at the cover plate. I see this often in California homes with exterior-facing bedrooms, older living room walls, and rooms that take the brunt of wind exposure. Remove the plate and the actual leak is often around the electrical box, where drywall cuts, wire penetrations, and framing gaps leave a path for outside air.
That matters because outlet insulation does two jobs at once. It reduces unwanted air movement, and it helps tighten the building envelope in a spot many homeowners miss.
It supports comfort, maintenance, and risk reduction
Done correctly, outlet insulation can improve day-to-day comfort and support the kind of upkeep that insurers like to see. A house with fewer small air leaks is easier to heat and cool, less likely to develop moisture trouble from uncontrolled airflow, and generally better protected against outside conditions.
In California, that bigger picture counts. Insurance agents and underwriters pay attention to signs of deferred maintenance, fire exposure, and how well a home has been hardened against weather and wildfire risk. Sealing outlets will not change a policy on its own, but it fits the same risk-reduction mindset as ember-resistant vents, weatherstripping, and other smart upgrades covered in these California home protection guides.
If you want a good visual overview of the basic methods used to prevent air leaks from outlets, it's helpful to review the difference between sealing the cover plate area and sealing the box-to-drywall gap. People often do the first and miss the second.
A draft at an outlet is rarely random. Air is following an opening, and the fix is to close that opening without creating an electrical hazard.
What works and what doesn't
A foam gasket behind the cover plate can help with light air leakage. It is a good first step, but it is not a cure-all. If the drywall opening around the box is oversized, cracked, or poorly cut, the gasket alone will leave the main leak in place.
The better repair is usually layered. Install the gasket. Then inspect the perimeter of the box and the condition of the wall cutout. If air is moving through that edge, the lasting improvement comes from sealing the box-to-drywall gap with the right fire-safe approach for the location, not just dressing up the plate.
That is the trade-off DIYers need to understand. The quick fix is easy. The effective fix takes a closer look at where the air is getting in.
Your Safety Checklist and Essential Toolkit
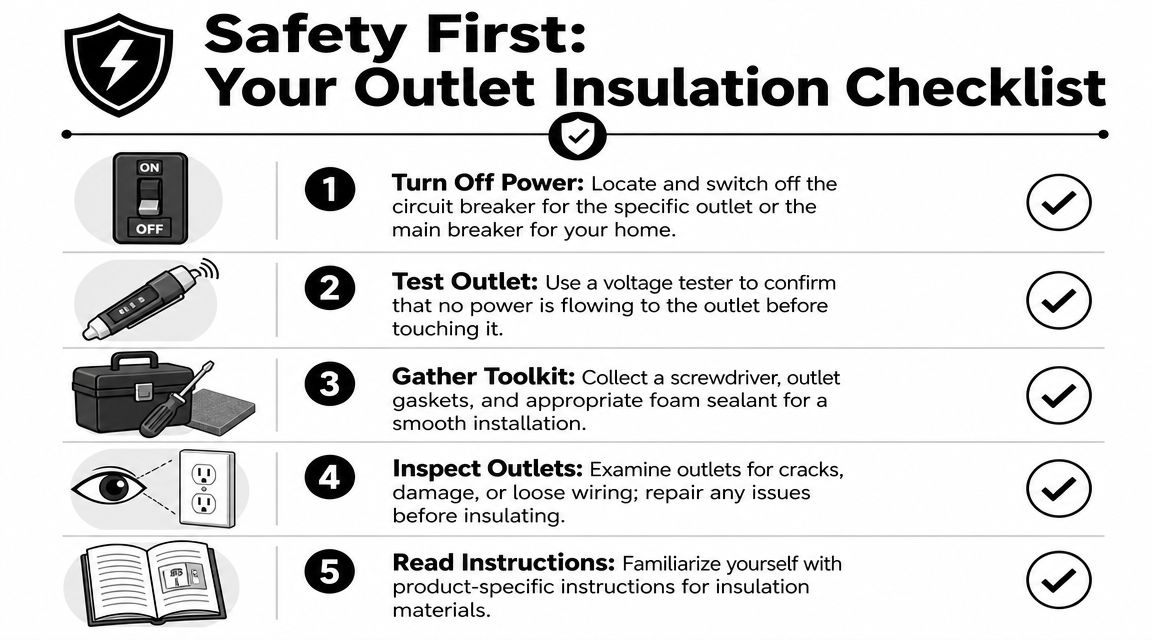
Before you remove a single cover plate, shut the power off. That isn't a suggestion. Outlet insulation is easy work when the circuit is dead and risky work when it isn't.
Use the breaker panel, then verify the outlet is de-energized with a non-contact voltage tester. Don't trust labels on an old panel. Don't assume one outlet is off because the lamp in another room went dark.
Start with the leak test
One of the simplest ways to find the worst offenders is a smoke test. The National Association of Certified Home Inspectors recommends using an incense stick or smoke pen on a windy day. If smoke moves horizontally in front of the outlet, a draft is present (Allstate summary of the NACHI smoke test).
That test does two useful things. It confirms the leak is real, and it helps you rank which outlets deserve attention first.
Pre-flight checklist
Use this before you start:
- Kill the circuit: Turn off the breaker for the outlet, or the main breaker if you can't isolate the circuit with confidence.
- Verify no power: Check the receptacle with a non-contact tester before touching the plate screws or device straps.
- Inspect the outlet condition: If you see cracked plates, brittle plastic, scorching, looseness, or damaged wiring insulation, stop and call an electrician.
- Gather the right materials: Foam outlet gaskets, flat-head and Phillips screwdrivers, acrylic/latex caulk, low-expansion foam labeled for gap sealing, extra cover plates, and a utility knife.
- Work clean: Keep sealant out of the electrical box interior. The target is the perimeter around the box and behind the plate, not the wiring compartment itself.
What belongs in your toolkit
Some tools are optional. A few are not.
| Tool or material | Use |
|---|---|
| Non-contact voltage tester | Confirms the outlet is actually off |
| Screwdriver set | Removes cover plate and device screws |
| Foam gasket | Adds a draft stop behind the faceplate |
| Acrylic/latex caulk | Seals small perimeter gaps cleanly |
| Low-expansion foam | Fills larger gaps around the box from the wall side |
| Utility knife | Trims cured foam if needed |
| Flashlight | Helps spot voids and damaged box edges |
If you're trying to build a broader maintenance plan around risk reduction, the homeowner resources on California insurance guides can help you think beyond one repair and look at how small projects fit into larger protection decisions.
Safety note: If you don't know whether you're dealing with a standard receptacle, a switched outlet, or a GFCI-protected circuit, pause before disassembly.
Installing Outlet Insulation Step By Step
A loose, drafty outlet on an exterior wall looks minor until you pull the plate and find a rough drywall cut, a visible gap at the box, and years of air movement through the wall cavity. That is the kind of small defect I flag for California homeowners because it affects comfort, moisture control, and the overall condition insurers notice when a house shows clear signs of maintenance.
Remove the plate and inspect the opening
With the circuit already shut off and verified, remove the cover plate carefully and set the screws aside. Look past the plate itself. The underlying problem is often the gap between the electrical box and the drywall, especially in older homes or quick remodels where the cutout was never finished cleanly.
Check these points as soon as the plate comes off:
- Whether the receptacle sits tight and square in the box.
- Whether the drywall opening leaves visible space around the box.
- Whether you see staining, soot, crumbling wall material, or box movement.
If anything about the wiring layout looks unfamiliar, use Value Tools Co's wiring instructions only as a basic visual reference. If the setup is confusing, stop there. Outlet insulation is a simple air-sealing job. Sorting out questionable wiring is not.
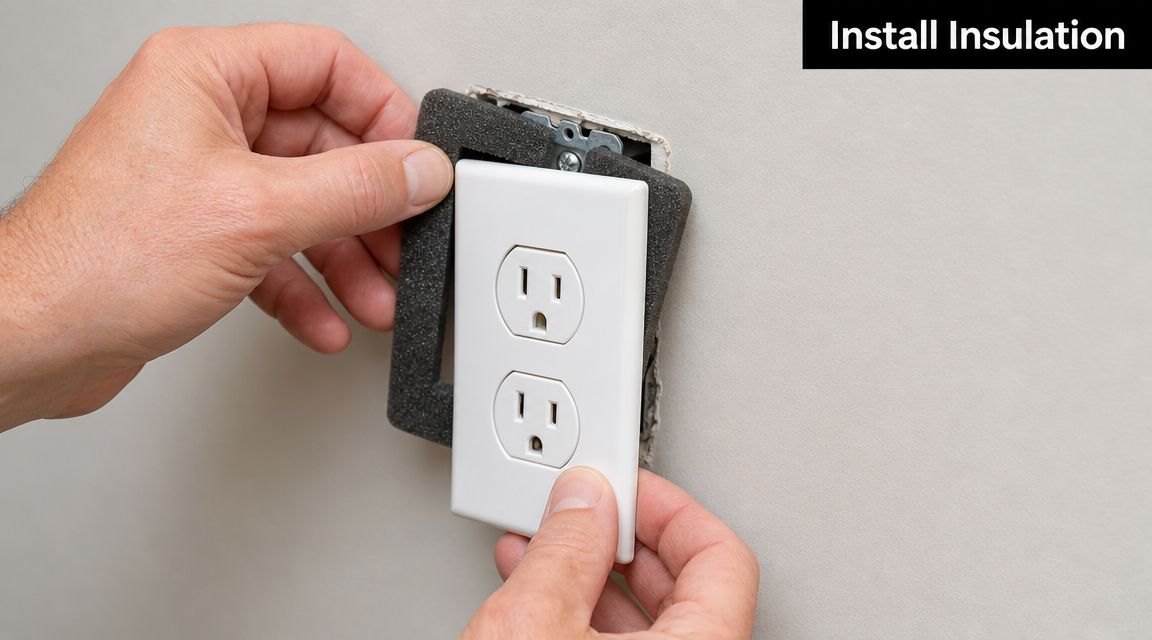
Install the foam gasket
Set the foam gasket over the receptacle so it fits flat against the wall surface, then reinstall the plate and tighten it just enough to compress the gasket evenly. Overtightening can crack older plates or warp the fit.
A gasket helps with light air leakage at the faceplate. It does not fix a sloppy opening around the box.
That distinction matters.
Seal around the box
For narrow, clean gaps, run a small bead of acrylic/latex caulk around the space between the box and drywall. For wider or uneven voids, use low-expansion foam labeled for gap sealing. Apply it sparingly and let it expand on its own. Too much product creates a mess and can force trim work or plate alignment problems later.
Keep all sealant out of the electrical box interior. The target is the perimeter around the box, not the wiring compartment. I tell homeowners to treat the box opening like finish work, not a cavity to fill.
If cured foam pushes past the wall surface, trim it flush with a utility knife before reinstalling the plate.
Reassemble and check your results
Once the sealant has cured enough for safe reassembly, put the plate back on, restore power, and check the outlet area by hand on a cool or windy day. The wall should feel calmer, with less air movement around the plate and less temperature swing at that spot.
If you still feel a strong draft, the leak may be coming from a larger wall penetration, an unsealed top plate, or another opening nearby. At that point, the outlet was only the symptom.
Special cases on exterior walls and outdoor locations
Exterior-facing outlets deserve more caution because moisture and code requirements enter the picture. Indoor outlets on exterior walls are usually an air-sealing project. Outdoor receptacles are different. Cover type, weather resistance, and GFCI protection come first.
Farmers guidance on exterior outlets and GFCI protection is a useful homeowner reference if you are checking whether an outdoor setup is protected correctly. That matters in California, where small envelope and electrical maintenance issues can add up during underwriting reviews, especially on homes already being evaluated for wildfire exposure and deferred upkeep.
For more practical maintenance articles tied to protection, ownership costs, and insurability, the California home and insurance blog is a good resource.
California Risks and Insurance Savings
A Santa Ana wind event is the wrong time to discover how many small gaps your house still has. In California, outlet insulation is more than a comfort upgrade. It is one of those low-cost maintenance jobs that supports a tighter building shell, lower operating costs, and a better risk profile.

I talk with homeowners and insurance agents about this point all the time. Carriers are not handing out discounts because you installed a few foam gaskets. They are looking at whether the home shows a pattern of care or a pattern of deferred upkeep. Sealed wall penetrations, controlled moisture, maintained roofing, ember-resistant vents, and defensible space all point in the right direction.
That matters more in California than in many other states.
Wind-driven embers look for openings. So does outside air. An outlet on an exterior wall is a small penetration, but small penetrations add up, especially in older homes with other envelope weak points. Sealing them will not turn a house into a wildfire-hardened structure by itself. It does show the same discipline behind broader home-hardening work.
There is a practical money side to this too. As noted earlier, unsealed outlets and switches can contribute to overall air leakage. The savings from sealing them are usually modest on their own, but the project is inexpensive, fast, and easy to combine with other weatherization work. That is a solid trade-off for homeowners trying to cut drafts without opening up walls.
Here is how I frame it for clients:
| If you leave outlet leaks alone | If you seal them correctly |
|---|---|
| Drafty rooms stay drafty | Comfort usually improves near exterior walls |
| HVAC runs against avoidable leakage | Heating and cooling work under better conditions |
| Minor maintenance issues keep stacking up | The home shows better envelope care |
| Underwriters may see more signs of deferred upkeep | The property presents as better maintained |
Insurance savings, if they show up at all, are usually indirect. A well-kept house is easier to place, easier to document, and less likely to raise concerns during underwriting or renewal reviews. If you are comparing coverage in a higher-risk ZIP code, review your current policy against available California home insurance options and treat outlet sealing as one part of the larger risk-reduction file.
That is the right mindset in this state. Handle the small openings before they become part of a bigger maintenance story.
When to Call a Professional
Some outlet drafts are simple. Some are symptoms. The difference matters.
If you install a gasket, seal the perimeter, and still feel air movement, step back and reassess. Home improvement guidance from RetroFoam advises that when sealing an outlet doesn't stop a draft, the issue may point to a larger building envelope problem, which can mean missing insulation, bigger cavity leakage, or the need for more extensive professional foam work within the walls (RetroFoam on drafts that signal bigger envelope issues).
Signs the problem is bigger than the outlet
A localized fix may not be enough if you notice any of the following:
- Multiple outlets leaking on the same exterior wall: That often suggests a wall cavity or sheathing-side air path.
- Strong drafts after gasket and perimeter sealing: The air may be bypassing from another opening and exiting at the box.
- Cold wall surfaces beyond the outlet area: That can point to insulation voids, not just box leakage.
- Recurring moisture staining or musty smell: That's no longer a simple air-seal job.
When an electrician should take over
Call a licensed electrician if the outlet has loose wiring, visible damage, a cracked box, frequent breaker trips, buzzing, heat, or signs of scorching. Outlet insulation is a building-envelope task. Electrical repair is a different trade, and mixing them carelessly is how homeowners create unnecessary risk.
A good rule is simple. If the problem is air, seal around the assembly. If the problem is wiring, box integrity, or device condition, stop and hand it off.
A Safer Home and a Smarter Policy
Outlet sealing is one of those jobs that rewards careful homeowners. It isn't flashy, and it won't change the look of the room, but it can make a house feel tighter, calmer, and better maintained. Done right, it also respects the safety limits that matter most. Power off first. Seal around the box, not inside it. Escalate when the draft points to a bigger wall problem.
For Californians, that mindset carries beyond a single receptacle. The same homeowner who insulates electrical outlets properly is often the homeowner who pays attention to roof condition, moisture paths, wildfire exposure, and the details that shape insurance outcomes over time.
That bigger picture matters whether you own a house, rent an apartment, insure multiple vehicles, or want to review family protection overall. If you're a renter, don't overlook how broader preparedness and property protection habits pair with practical California renters insurance coverage.
The smartest approach is to match physical protection with financial protection. A well-maintained home deserves a policy review that's just as careful.
If you've been making smart upgrades around your home, it's a good time to review your coverage too. Mai & Associates helps Californians compare home insurance, auto insurance, car insurance, renters insurance, and life insurance options with guidance considering wildfire risk, FAIR Plan questions, and real-world budget concerns. Ask for a policy review and make sure the work you're putting into protecting your home is backed by coverage that fits.